
[1 x 4] + 1 Macropad User Guide [Legacy]
IMPORTANT NOTE: This is the user guide for the first generation of macropad purchased before 2022. There have been updates to VIA since this was published. Please use https://usevia.app/ for the latest version of the app. Access will be requested by the website to make changes to your macropad.
Get Started
Download VIA Configurator to easily customize your keys
Every [1 x 4] + 1 Macropad we ship has default assigned functions, so you can plug it in and it’s ready to use. Depending on which knob function you ordered, the defaults are one of the following:

Layers are enabled by default, and to toggle between layers, press the button assigned TG(1) (in the default configuration, press the knob button). The default configuration has one layer of blanks (except for the layer toggle on the knob button).
Note: You don’t need VIA to use the macropad, only to program/customize it. The [1 x 4] + 1 Macropad will work on computers that don’t have VIA installed with the functions you defined using VIA.
Installing VIA:
VIA is an open-source software that can be used to configure the [1 x 4] +1 Macropad. It’s not the only way to do so, but it’s our preferred way due to its relatively intuitive user interface and how easy it is to get up and running.
Step 1) Choose the download file for your OS:
Latest release: VIA Github Link
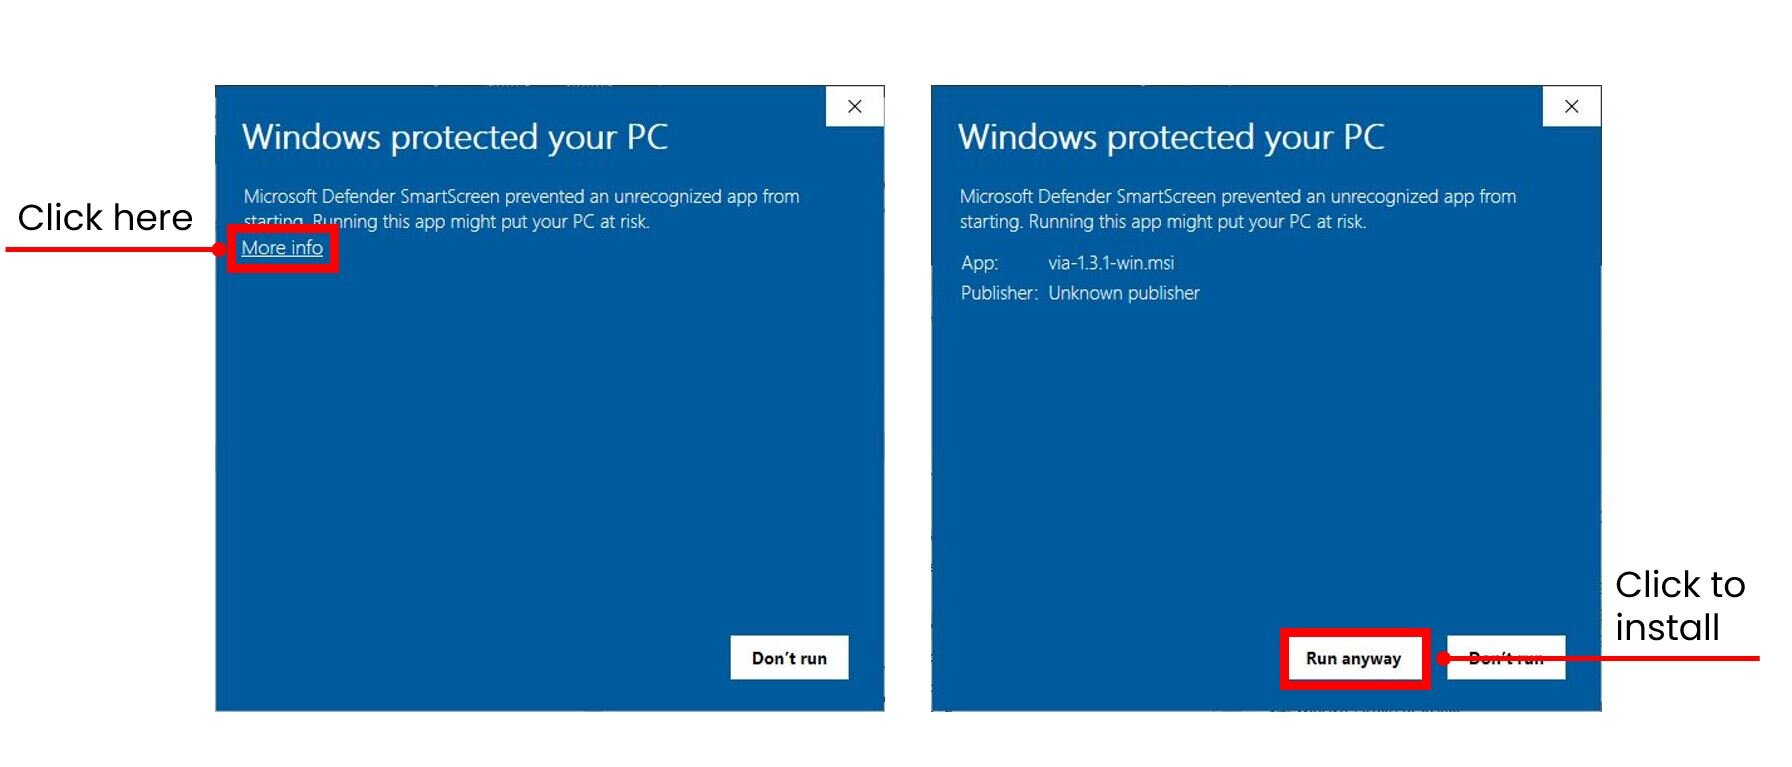
Step 2) You might see an “unrecognized app” screen on Windows. Run anyway by following the screenshots below.
Step 2) If you have MacOS, you must go to “Security and Privacy” in your Settings in order to approve it!

Step 3) Once you’ve installed and downloaded VIA, the configurator should automatically detect your [1 x 4] + 1 Macropad and you should see the following:
Assigning Existing VIA Functions/Hotkeys:
VIA has various existing functions that you can assign. Depending on your OS and how your system is configured, your computer many not recognize all the pre-configured VIA hotkeys as expected - this is mainly true with Calculator, Mail, Sleep, Search, Screen+, My Comp, etc.
Step 1) Enter the KEYMAP tab at the top left hand corner.
Step 2) Ensure that you’ve selected the correct Layer with the key that you want to assign. Layers are discussed in more detail in the next section.
Step 3) Navigate to the tab with the hotkey / shortcut you want to assign. In this case, we will be trying to assign the “Refresh” hotkey under the SPECIAL tab.
Step 4) Select the key you want to assign the hotkey to on your keypad. The key will highlight to show that it’s been selected.
Step 5) Click the desired hotkey to assign to the selected key. In this example, it is “Refresh.”
Layers:
Layers allow you to assign each key multiple functions depending on which layer is active. The [1 x 4] + 1 Macropad is programmed to support two layers by default on VIA: Layer 0 and Layer 1.
If you decide to utilize the two layers, make sure that you have one “TG(1)” key assigned in each Layer, otherwise you will be able to toggle into a layer and not be able to toggle back. The default behavior of layers is: Layer 0 is on by default, Layer 1 is toggled on or off over Layer 0.
Writing & your own keyboard shortcuts/macros
VIA also makes it easy for beginners to create and assign custom keyboard shortcuts.
Additionally, the ability to write and assign your own macros makes VIA a really powerful tool for customizing the keyboard to your specific needs. There are two main steps: 1) writing the macro and 2) assigning the macro.
In this example, we will be trying to create a key that is the macro CTRL + SHIFT + TAB, which is the keyboard shortcut for cycling through tabs on Google Chrome.
Writing the Macro/Keyboard Shortcut
Step 1) In the following described case, a macro or keyboard shortcut is a string of keys that we are attempting to press all at once. Start by launching VIA and clicking on “MACROS” at the top left hand corner. You will see the following screen:
Step 2) Type out your macro. For VIA to recognize it, the macro will have to be surrounded by { }. VIA only recognizes keycodes, and the keys must be defined using those. Once you start typing, a list of possible keycodes will be listed underneath. Separate the keycodes by a comma.
For keys such as CTRL, ALT, SHIFT, and WINDOWS, you must specify which one. In this example, we are using the Left CTRL button.
Note for MacOS users: The “Windows Key” keycode is recognized by MacOS as the “Command” key. For example, if you write a macro that was WINDOWS KEY + C in VIA, and you plug the macropad into a computer running MacOS, the macro will be recognized as COMMAND + C.
Don’t forget to Save your Macro at the bottom right!
For a list of all keycodes recognized:
Assigning the Macro/Keyboard Shortcut
Step 1) Enter the KEYMAP tab at the top-left hand corner. Choose the LAYER with the key that you want to assign the macro to. In this example, the key we want to assign is in Layer 0.
Step 2) Enter the MACRO tab at the bottom-left hand corner.
Step 3) Click on the key you want to assign the macro. It will highlight your selected key in orange.
Step 4) Click on the macro number that you want to assign. In this case, we previously saved the desired macro to slot MACRO 0, which corresponds to M0 as shown.
The “Any” Key & Modifier Keys
By default, the behavior of macros in the MACROS tab in VIA is that it is registered as a single press and can not be pressed and held. You will also unable to use MACROS in conjunction with another key on the macropad. The Any key allows you to assign modifiers to a key to achieve this, if desired.
Using the “Any” key for modifier keys allows you to do things like assign a macro on one key and use it in conjunction with another key on the macropoad. In this example, the Any key is defined to use modifiers to assign LCTRL + LSHIFT to the first key. This allows it to be used in conjunction with the TAB assigned on the macropad for CTRL + SHIFT + TAB (cycles through tabs on Google Chrome). If you tried doing this with MACROS in which you assigned M0 to have CTRL + SHIFT instead of the Any key, it would not register.
List of modifier keys can be seen here: https://beta.docs.qmk.fm/using-qmk/simple-keycodes/feature_advanced_keycodes
Flashing with QMK Toolbox
Switch your rotary function or simply reset your macropad to factory settings
or… for more advanced users, using custom firmware with QMK
QMK is open-source firmware that can be used to program the [1 x 4] + 1 Macropad. This is much more complex than VIA, but provides more functionality (such as programming the rotary). See docs.qmk.fm/.
If you want to change the function of your rotary to the other default (volume or scroll), you will need to flash your macropad with a new configuration file (see below for downloads). You will need to do the following:
Installing QMK Toolbox:
Step 1) Choose the download file for your OS:
Linux: Only available in command line, must follow QMK tutorial: https://beta.docs.qmk.fm/tutorial/newbs_getting_started
Latest release: QMK Github Link
Loading Configuration File:
Step 1) Open QMK Toolbox
Step 2) Select “atmega32u4” under the “MCU (AVR only)” option
Step 3) Download (or compile) configuration file (.hex) and load it into QMK Toolbox (drag and drop, or open file)

Putting the Macropad into DFU Mode (will only last 5 seconds):
The Macropad is loaded with Bootmagic Lite. To enter DFU mode and flash your macropad:
Step 1) Unplug your macropad
Step 2) Hold down the left most key (key furthest away from the rotary)
Step 3) Plug in your macropad
You are in DFU mode if you get a message similar to:
*** Caterina device connected: Microsoft USB Serial Device (COM5) (932C:000F:0001) [COM5]
If this does not work due to corrupt firmware, you can also do the following:
Step 1) Open the back of your macropad (Phillips head screwdriver needed)
Step 2) Plug in your macropad
Step 3) Double click the reset button in quick succession
Flashing:
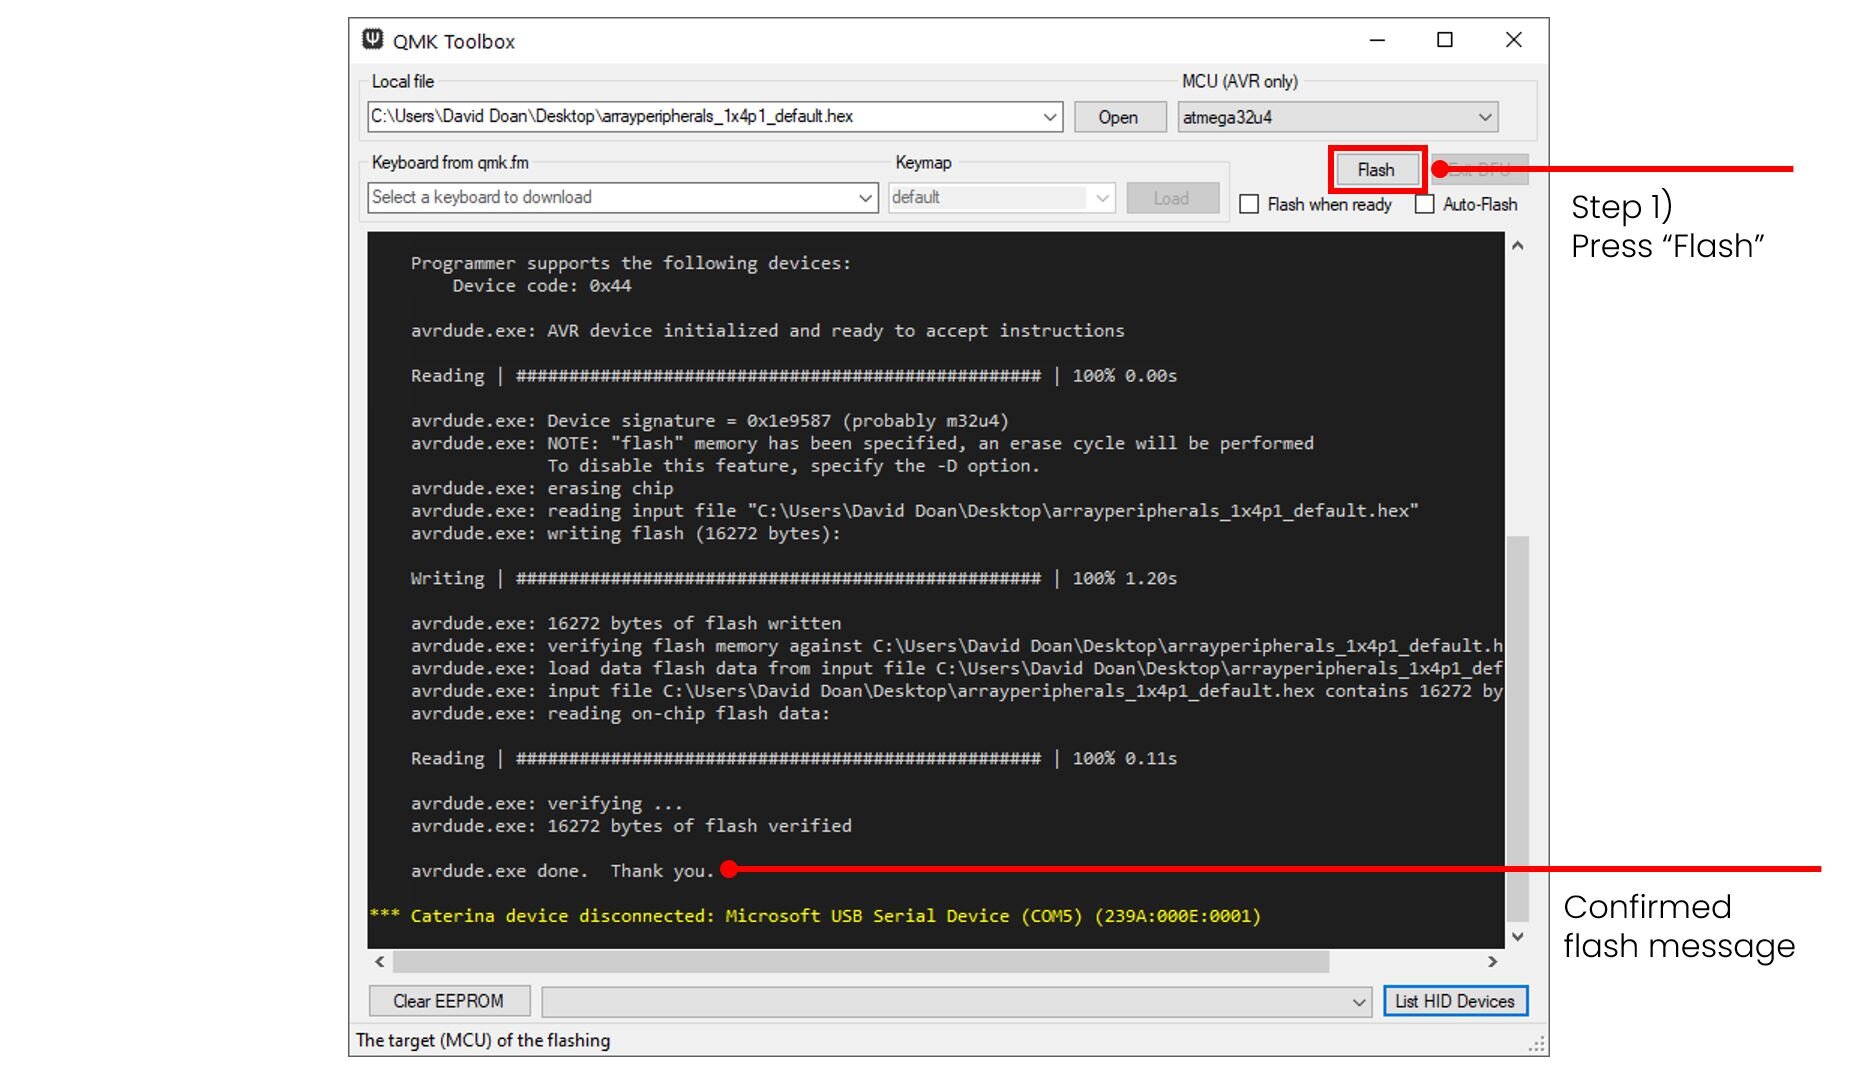
Step 1) Press “Flash” right after entering DFU mode
This will take a couple of seconds and it is successful if you get a message similiar to:
avrdude.exe: 16272 bytes of flash verified
avrdude.exe done. Thank you.
Factory reset & config file downloads
[1 x 4]+1 Macropad Keymap JSON File
If for some reason, your [1 x 4] + 1 Macropad keymap is not auto detected in VIA when plugged in, you can import this file under File -> Import Keymap